This video tutorial will show you some of the new features of Chat Mapper version 1.3.
We have been focusing mainly on productivity enhancements and we will show you a few of those right now.
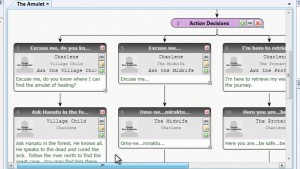
To begin with, we added Conversation Links. Previously each dialogue tree such as the ones in the example, that represents a single conversation in the Conversations List, each node could only be linked to another node in that conversation. Now with the conversation links, we can link conversations together.
For example, we will open up up conversation number two and at the end of the branch I want to link directly to conversation 3 and just go ahead and start it in the simulation right after the last node. So just right click and choose Link to Conversation and then choose conversation number 3, the one I want to link to and click “OK”. Now we have a new type of connector that is created and says: To Convo: 3. If we right click and say Follow Link it will open up that conversation, not only that but when I simulate, once I get to this node, the next node to load will be the root node in conversation 3. And I will be prompted with choices or based on the conditions it follows the correct branch.
That is one example of the type of enhancements we implemented. That one is available to all versions.
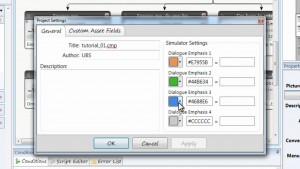
We also added Localization and is only available to commercial licenses, at this time. You will notice that in the main interface there is this new drop down called Act of localization and is set to default. To add more languages to the project, I go to Project, on the menu, then Project Settings, Custom Assets fields and Dialogue Nodes.
You will notice that the old dialogue texts field, which can not be changed is the “Type” Localization now instead of text. Each custom field that you add that is marked as Localization will be interpreted as a new language.
I can just click on Add Field, name it fr-FR for French language, change the type to Localization and I might as well add a second language, es- ES, just to demonstrate, type Localization, so they are both set to Localization and click ok.
And what that does, is on each node, if I look at the properties I now have a French field and a Spanish field. Now we could go through and fill the nodes by hands but it would take a long time but it’s not very convenient. So we have added a quick way to do that.
Each of the languages I have just added now show up in the drop down list from Active Localization. So if I just choose, French it will load in all of the French dialogue for the entire project. And since I haven’t defined anything yet, they are all blank (in the example).
That brings me to the next enhancement, which is xcel export and import. So this is what we’re going to use to quickly fill in the Localization text. Switching back to the default language, which is English in this case. I choose File, Export, Project and Project Data to Excel. This is a feature that is available to Indie and Commercial License holders. We will click on export to excel and we will export this to Example Assets. Xls, click save and it will prompt me to choose what I want to actually export. To this I am just localizing the text so I don’t need any of the actors or locations, just the conversations, at this point. Click OK and it will export.
Now you will have an xls file in which each conversation is in a separate tab, conversations 1 to 4. Each conversation contains a list of all of the dialogue nodes in that conversation, along with all of the custom asset fields. At the end we will have the French and Spanish Localization columns. Now we can send this to a localization team, they can fill in those values and then send this file back to me. After that is complete, it is basically the same file but with the localization files. So we have the Spanish and French language for each node that has any dialogue text.
Now, all we have to do is go back to Chat Mapper, File, Import, Data From Excel and I choose that localized Excel file. It will recognize that there are no actors, items or locations present so the only thing I can import is the conversations and dialogue. Click ok and it will give you an Import Summary. For the current example we have 4 matched existing conversations, 9 of the dialogues actually match the existing, so they are probably ones that did not have any texts, 73 were updated so now I can switch to the French localization of this drop-down list and all the French localizations are loaded automatically in the display tree. So now I can quickly browse through and view the flow of the conversation.
I can also play the conversation at this point and see the French localizations.
The last I wanted to talk about is the Command Line interface. Now, this is very good for commercial license holders as well. Here I can essentially automate the process of exporting to any of the vailable formats. To do this, you can refer to the Help documentation. There is a new section called Command Line Tools and this is how you form the command line syntax. Basically it is the executable a [command] for the export, even custom exporters that you may create, the output path and a number of input cmp files, separated by comas. Now to quickly demonstrate.
In your command line. Let’s say we want to export two files to xml format. All I need to do is Open up my installation directory and reference the Chat Mapper executable, then type the format I want to export to, the specify your output folder, let’s say on the desktop called Output (you can just drag thr path in the command line), then we specify the files. So let’s say I want to export a file called Example (a cmp file)(drag it into the command line) and also a project called (for this example) Untitled (a cmp file as well). You separate the input files with comas.
C:\ Users\CurrentUser>”C:\Program Files (x86)\Chat Mapper\ Chat Mapper.exe” – xml “C:\Users\CurrentUser\Desktop\Output” “C:\Users\CurrentUser\Desktop\Example.cmp”, “C:\Users\CurrentUser\Desktop\Untitled.cmp”.
Close Chat Mapper to avoid any file permission conflicts. Now in command line just press Enter and this will open a console output and that shows the export progress. Close the command line and you will see that in your output folder you have both xml files that were selected for export.
With that you have a brief overview of some of the new productivity tools in Chat Mapper 1.3 and we hope you find them useful.
 Chat Mapper Tutorial (Basics) Part 1 of 2
 Chat Mapper Tutorial (Basics) Part 2 of 2
 Chat Mapper Tutorial (Scripting) Part 1 of 2